Tablet Profiles
A tablet profile is a named set of settings for the tablets on your buses. You build a profile, adjust the settings you want to change, and assign it to specific vehicles so each tablet picks up the right configuration the next time it checks in.
Who uses this: district office staff and administrators who manage tablet setup.
Where to find it
Go to Settings → Tablet Profiles in the sidebar.
What you'll see
A list of your tablet profiles. Each row shows the profile name, how many vehicles it's assigned to, how many settings it changes from the baseline, its status, and who last modified it.
- The Default profile is always listed first. It sets the baseline and applies to every vehicle that isn't assigned to another profile.
- Use the search box to find a profile by name, and the status filter to show Default, Active, or Retired profiles.
- An amber "N outdated" badge next to the vehicle count means some assigned tablets haven't picked up the latest version yet.
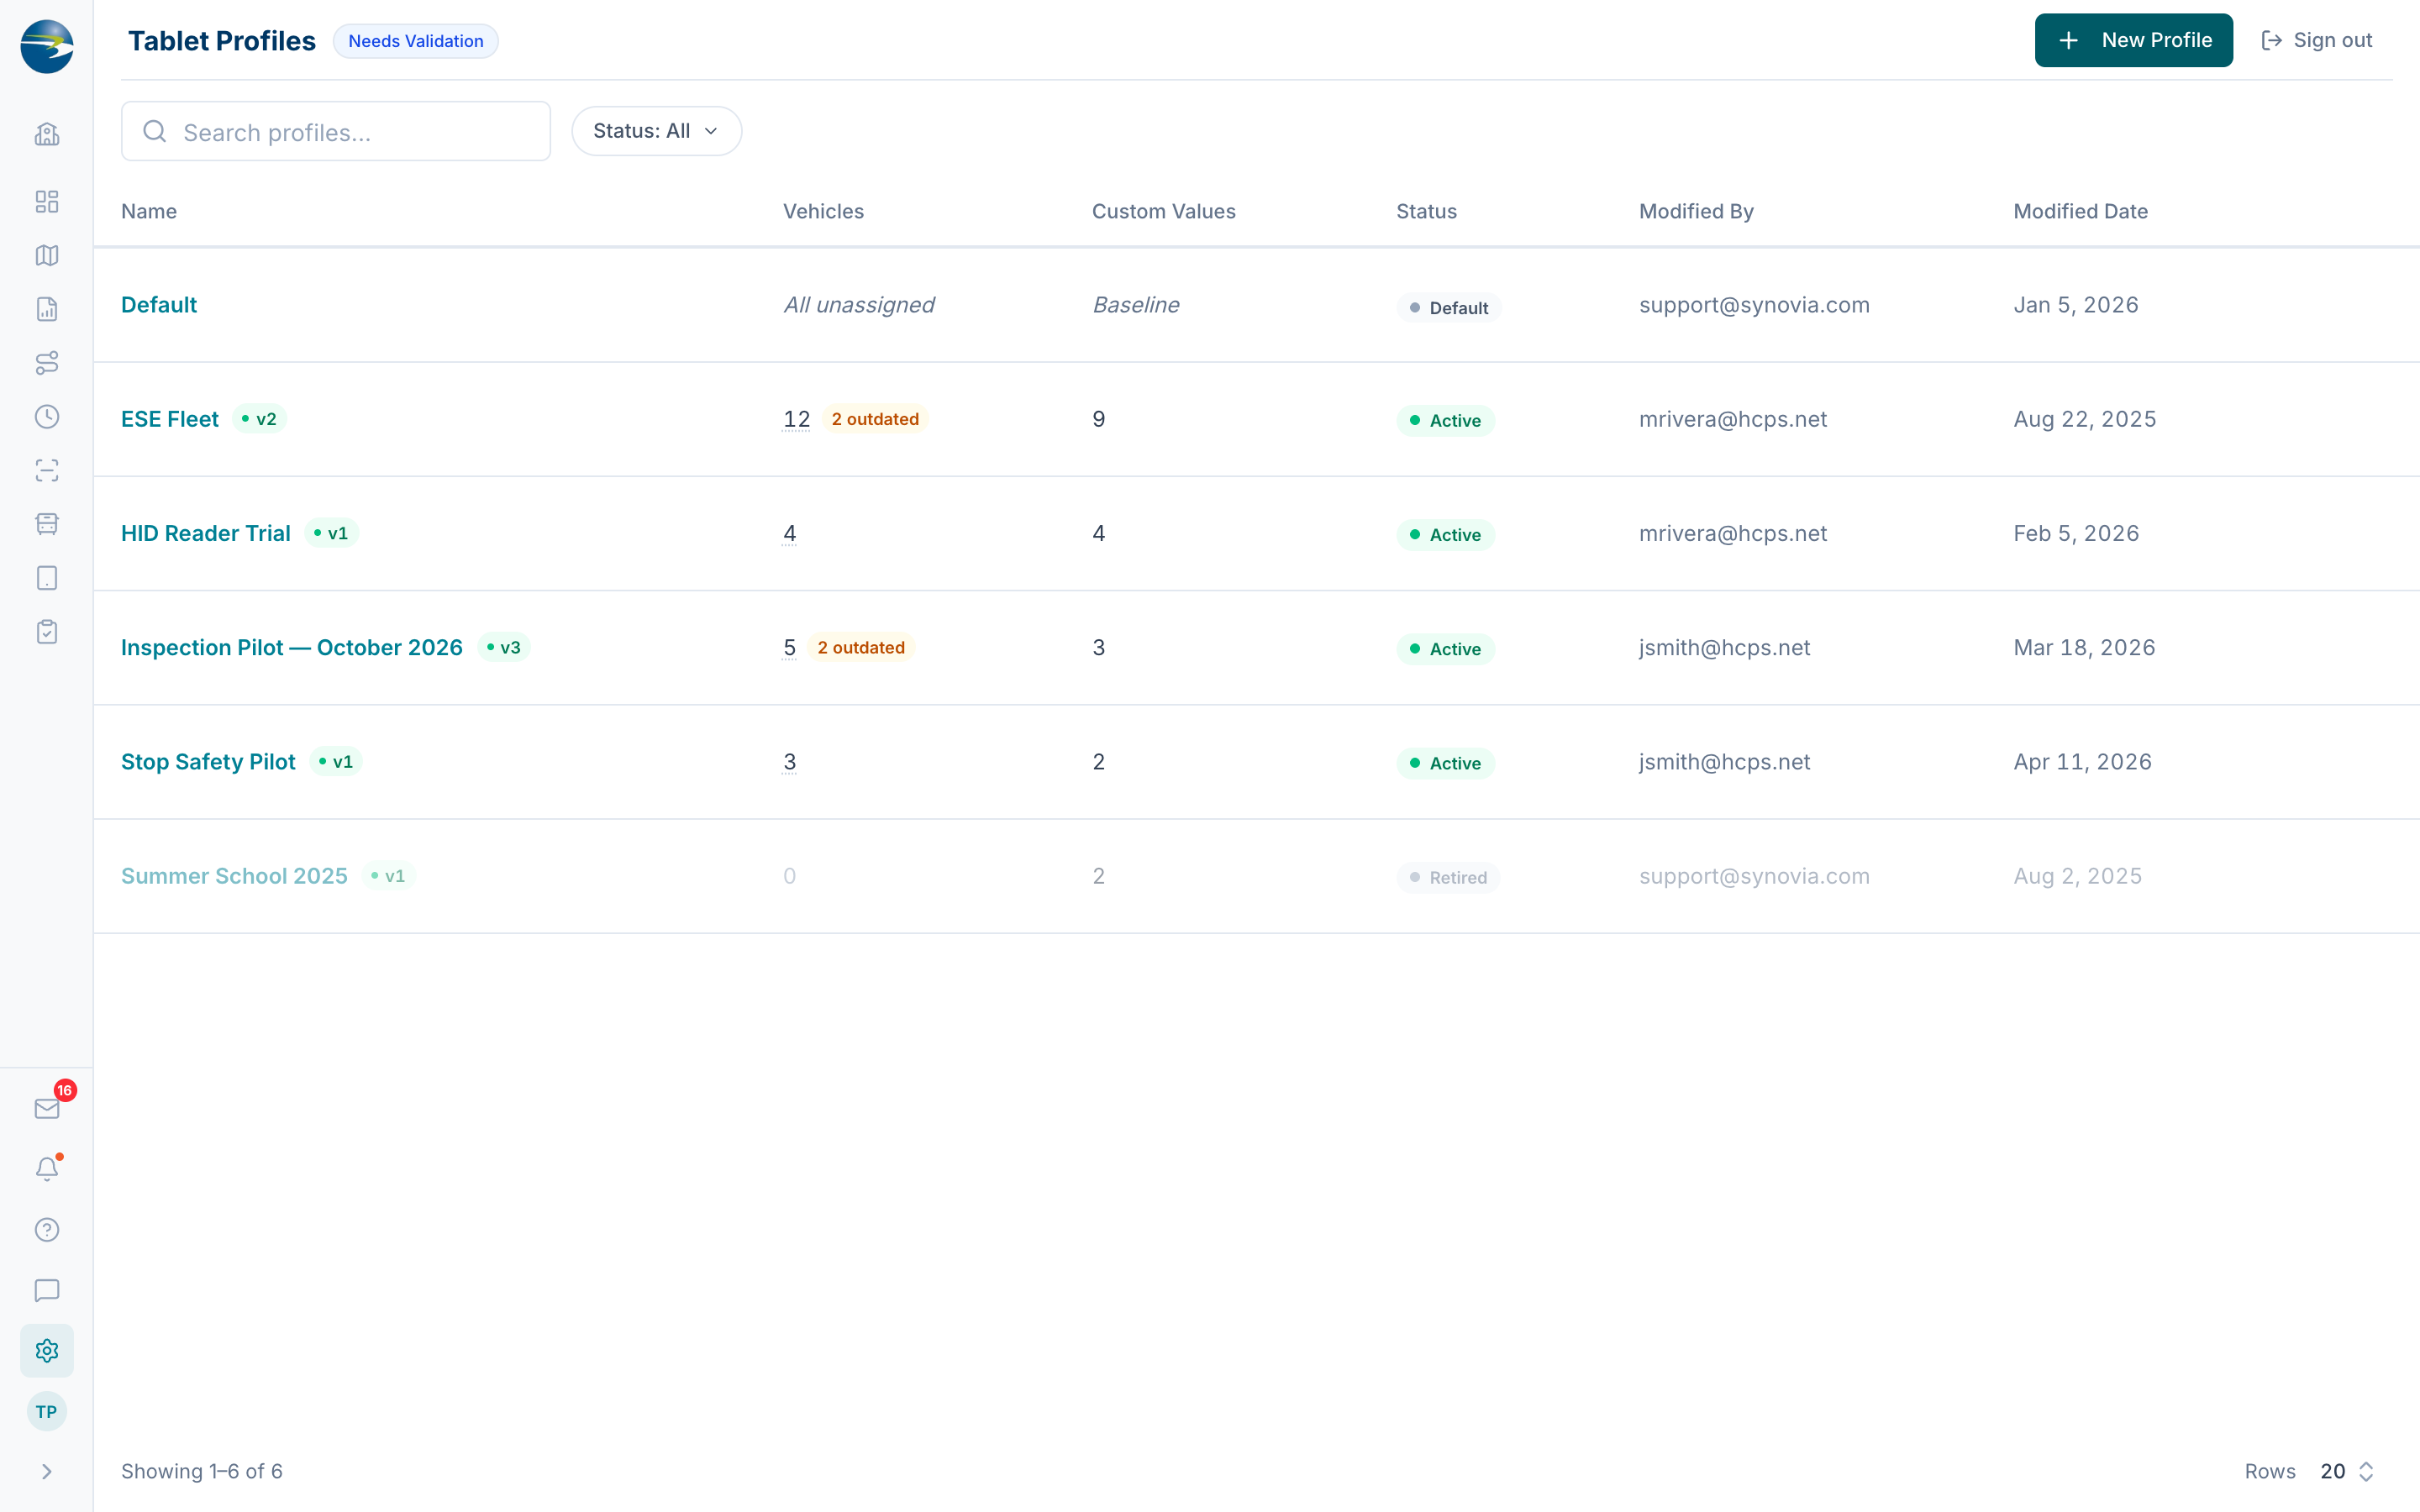 The Tablet Profiles screen.
Create a profile
- Select Add Profile (top right).
- Enter a Name (required) and, if you like, a Description.
- Select Create. The new profile opens automatically so you can adjust its settings.
Note
Profile names have to be unique. If a name is already in use, you'll be asked to pick another before you can continue.
Adjust a profile's settings
Open a profile to see its settings, grouped into categories such as General, Clock In, Inspections, Routes, Navigation, Student Ridership, and Messaging.
- Expand a category to see its settings.
- Change any setting you want. A CUSTOM badge appears next to values that differ from the baseline.
- Use the Custom only filter or the search box to quickly find settings you've changed.
- Select Save. If the profile is already assigned to vehicles, you'll confirm before publishing, and those tablets pick up the change on their next check-in.
Note
Setting a value back to its baseline removes the change, so only the settings you actually customized are stored.
A category may be locked with a "License disabled" note. That means your district doesn't currently have the license for those features, so their settings are view-only.
What each setting does
Settings are grouped by module. Which modules you see depends on the licenses your district has, a locked module means that license isn't active. Here is what each setting controls.
General
Device-level settings that apply to every K-12 tablet.
| Setting | What it does |
|---|---|
| Used for School | Marks the tablet as a school bus device and turns on the K-12 workflow. |
| Cable Disconnected Message | Warns on screen if the tablet's power or data cable comes unplugged. |
| Clock Overlay When Moving | Shows a clock over the screen while the vehicle is moving. |
| Speed threshold for "Moving" (MPH) | The speed above which the tablet treats the vehicle as moving (default 5). |
| Display blank screen when vehicle in motion | Blanks the screen while driving to reduce distraction. |
| Show custom image on vehicle in motion | Shows a custom image instead of the app while driving. |
| Shut down when not charging | Powers the tablet off when it is taken off the charger. |
| Shut down after X seconds not charging | How long to wait before shutting down off the charger (default 1800, about 30 minutes). |
| Screensaver Enabled | Starts a screensaver after a period of inactivity. |
| Screensaver timeout (seconds) | Idle time before the screensaver starts (default 300, 5 minutes). |
| OTA window start hour / end hour | The hours of the day when the tablet may download and install updates (default 2 to 5). |
| Encrypt data in transit | Encrypts the data sent between the tablet and the server. |
| Using HID reader for student scanning | Turn on if the bus uses an HID card reader to scan students. |
| Left characters of HID scan to trim | Number of leading characters to strip from each HID scan (default 0). |
| Send Time to 7P Device | Syncs the tablet's clock to a connected 7P device. |
| Display custom confirmation popup | Shows a custom message the driver must acknowledge. |
| Text for confirmation popup | The wording shown in that popup. |
| Redirect location after confirmation | Where the driver goes after acknowledging (for example, None or Inspections). |
| Enable driver feedback | Lets drivers send feedback from the tablet. |
Clock In
| Setting | What it does |
|---|---|
| Require PIN to clock in | Drivers must enter their assigned PIN on the tablet to clock in or out. |
| Chime on motion without clock-in | Plays a repeating chime if the vehicle starts moving while no driver is clocked in. |
| Allow time approval | Drivers can review and approve their clocked hours on the tablet at end of shift. |
| Time approval method | How drivers confirm their hours: Checkbox (a single tap) or Signature (draw on screen). |
Inspections
| Setting | What it does |
|---|---|
| Minor / major defect classification | Replaces Pass/Fail with Pass, Minor Defect, and Major Defect (required by Canadian NSC Standard 13; a major defect must be reported immediately and prevents the vehicle from being driven). |
| Require notes on failed items | When a driver marks an item Failed, they must enter a note before they can submit. |
| Default items to Pass | Items start as Pass and drivers only mark the exceptions. When off, every item must be marked Pass or Fail. |
| Auto-create work orders from failed items | A failed inspection item automatically creates a work order in the Work Orders list. |
Routes
| Setting | What it does |
|---|---|
| Guardian-Required Indicator | Shows an icon on a student's stop when they can only be released to a parent or guardian. |
| Stop Arrival Radius | How close the vehicle must come to a stop for the tablet to register it as arrived. |
Navigation
| Setting | What it does |
|---|---|
| Play Audible Directions When Moving | Speaks turn-by-turn directions while the vehicle is moving. |
| When moving, aid driver with | What the tablet shows in motion (for example, map plus directions). |
| Way-points when a stop is bypassed | How many upcoming waypoints to keep showing when a stop is skipped. |
| MDT Stop Radius (meters) | How close the vehicle must get for navigation to count a stop as reached. |
| Show Only Next Navigation Step when Moving | While driving, show only the next step instead of the whole route. |
| Auto-display "Select Students" inside stop radius | Opens the student selection screen automatically when the bus reaches a stop. |
| Hide screen when Stop Arm is extended | Blanks the screen while the stop arm is out. |
| Off Road Distance (miles) | How far off the planned route before the tablet flags the vehicle as off-route. |
| Forced straight-ahead distance (miles) | How far the app keeps directing straight ahead before it recalculates. |
| Display Unit of Measure in Metric (KPH) | Shows speed and distance in metric units. |
Student Ridership
| Setting | What it does |
|---|---|
| Include Ridership | Turns on student ridership scanning on the tablet. |
| Automatically Close Scan Results | Closes the scan confirmation on its own after each scan. |
| Duplicate Scan Threshold (seconds) | Ignores a repeat scan of the same student within this many seconds. |
| Enable Walk Permit Check | Checks whether a scanned student has a walk permit. |
| Walk Permit Keep Scan Result Open | Keeps the scan result on screen when there is a walk-permit issue to review. |
| Medicaid Billing | Captures the ridership data needed for Medicaid billing. |
| Ridership Verification | Requires riders to be verified, not just scanned. |
| Enable MDT Ridership Verification | Turns on that verification step on the tablet. |
| Enable MDT Auto-Off | Automatically marks students off the bus under the configured conditions. |
| Allow marking all students off the bus | Lets the driver mark every student off the bus at once. |
Messaging
| Setting | What it does |
|---|---|
| Messaging Enabled | Turns on driver messaging on the tablet. |
| Default time range for tablet messages (hours) | How far back the tablet loads messages by default (default 24). |
Note
The tablet also shows a short tooltip next to many of these settings. Hover the ? icon by a setting to see its in-app description.
Assign vehicles to a profile
- Open the profile and go to the Vehicles tab, then select Manage (or use Manage Assignments from the row menu).
- Move vehicles between the Available list and the In this profile list. Use the search box to find a vehicle by name, type, or group.
- Select Save.
A vehicle can belong to only one named profile at a time. On the Vehicles tab, a "Running" chip next to a vehicle means the tablet is still on an older profile or version and hasn't synced the latest change yet.
Note
A profile stays with the tablet, not the vehicle. If you move a tablet to a different bus in your district, it keeps its profile assignment.
Versions and roll back
Every time you save changes to a profile, a new version is created and the old ones are kept. On the Versions tab you can view any past version or roll back to it, which republishes those settings as the current version. Assigned tablets then re-confirm the change on their next check-in.
Duplicate, retire, or delete a profile
Use the row menu (⋯) for these actions:
- Duplicate makes a copy with the same settings but no vehicle assignments.
- Retire hides a profile from everyday use. Retired profiles stay in the list, dimmed, and can be brought back with Unretire.
- Delete removes a profile.
Heads up
You can only retire or delete a profile that has no vehicles assigned to it. Reassign those vehicles to another profile first.
Good to know
- A profile name is required and must be unique.
- The Default profile can't be renamed, edited, duplicated, retired, or deleted. It's the baseline for everything.
- Tablet changes aren't instant. Assigned tablets pick up new settings the next time they check in.
- If you don't have edit access, you'll see profiles in view-only mode (no Add, Edit, or assignment changes).