Employee Fields
Employee fields are the data columns that make up an employee record, things like name, address, and any custom details your district wants to track. Each field has a data type, a section it lives in, and a few rules that control how it behaves.
Who uses this: office staff and Time & Attendance administrators.
Where to find it
Go to Settings → Employee Fields in the sidebar.
What you'll see
A single list of your employee fields, showing each one's section, name, data type, whether it's required, whether it must be unique, and a short description.
- Use the search box to find a field by name.
- Fields marked with a System badge are built in. You can view them, but you can't change or delete them.
- Select Employee Field Groups (in the header) to organize fields into groups, more on that below.
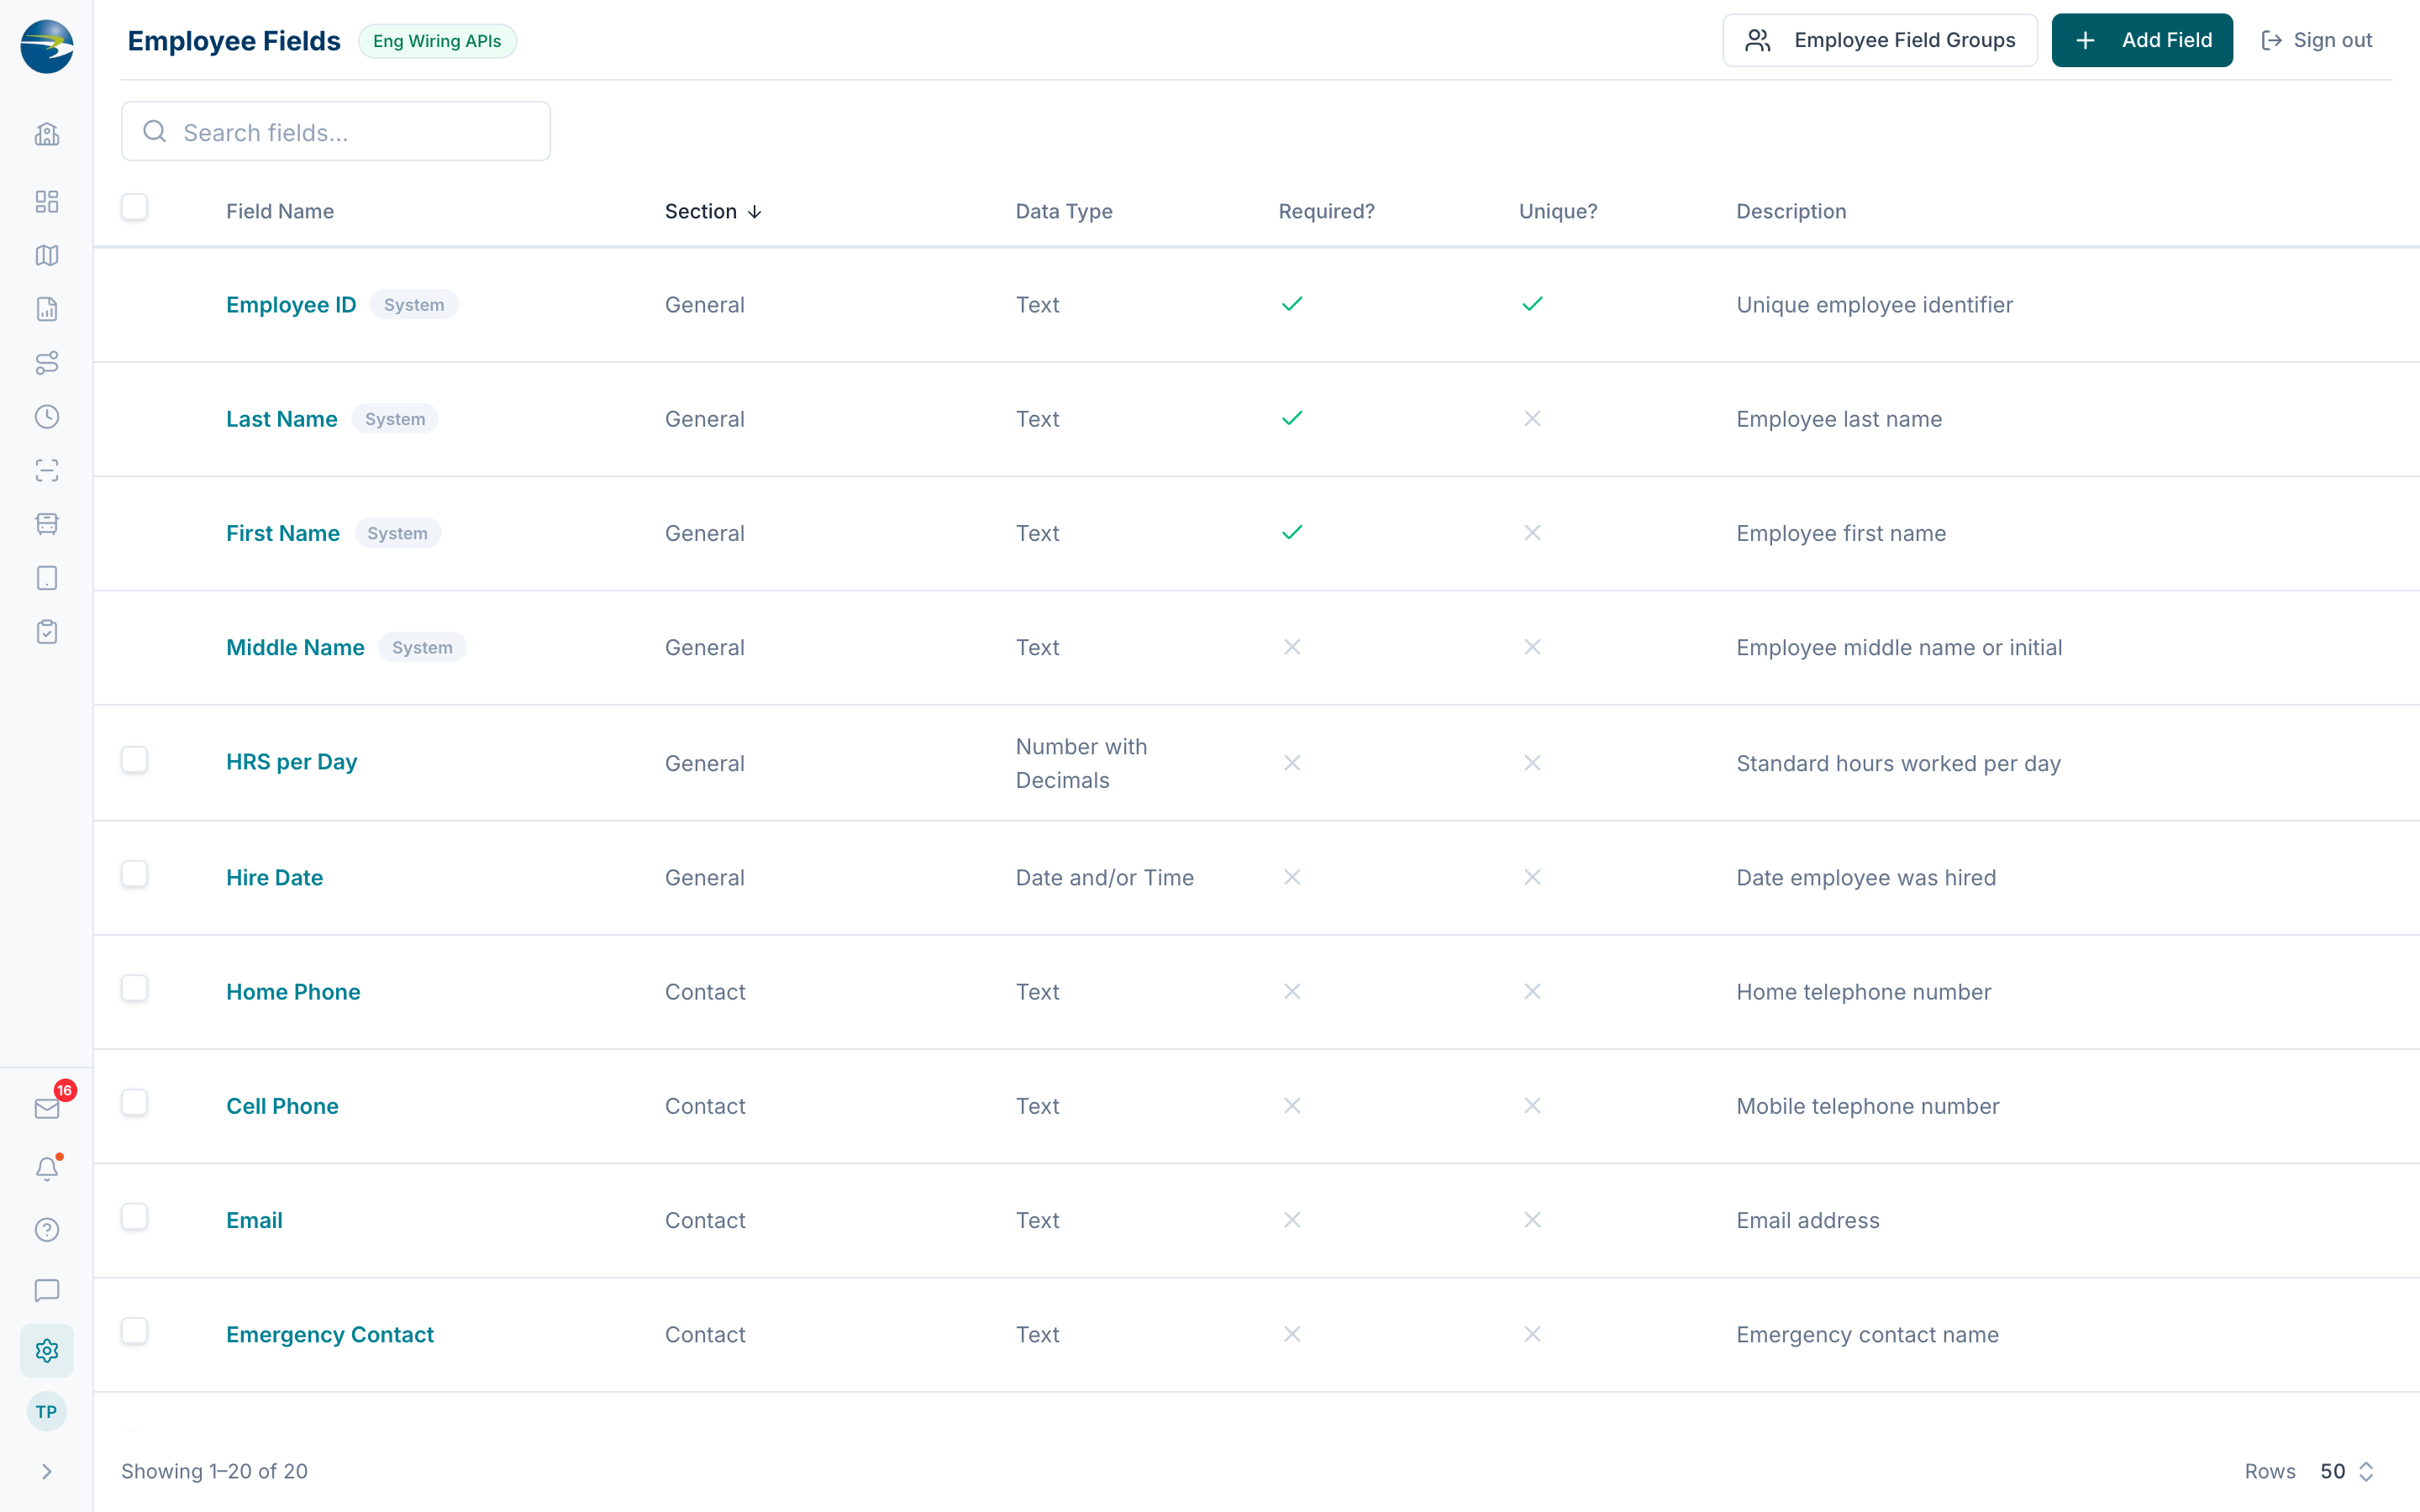 The Employee Fields list.
Add a field
- Select Add Field (top right).
- Enter a Name.
- Choose a Data Type: Text, Number, Number with Decimals, Date and/or Time, Yes/No, or Multiline Text.
- Choose a Section where the field should appear: General, Address, Contact, or Additional Information.
- (Optional) Turn on Required if every employee must have a value in this field.
- (Optional) Turn on Unique if each employee's value must be different from everyone else's.
- (Optional) Pick a Data Format to check the entry as it's typed: Phone, Email, or Zip. Leave it as None if no format is needed.
- (Optional) Add a Description to explain what the field is for.
- Select Save.
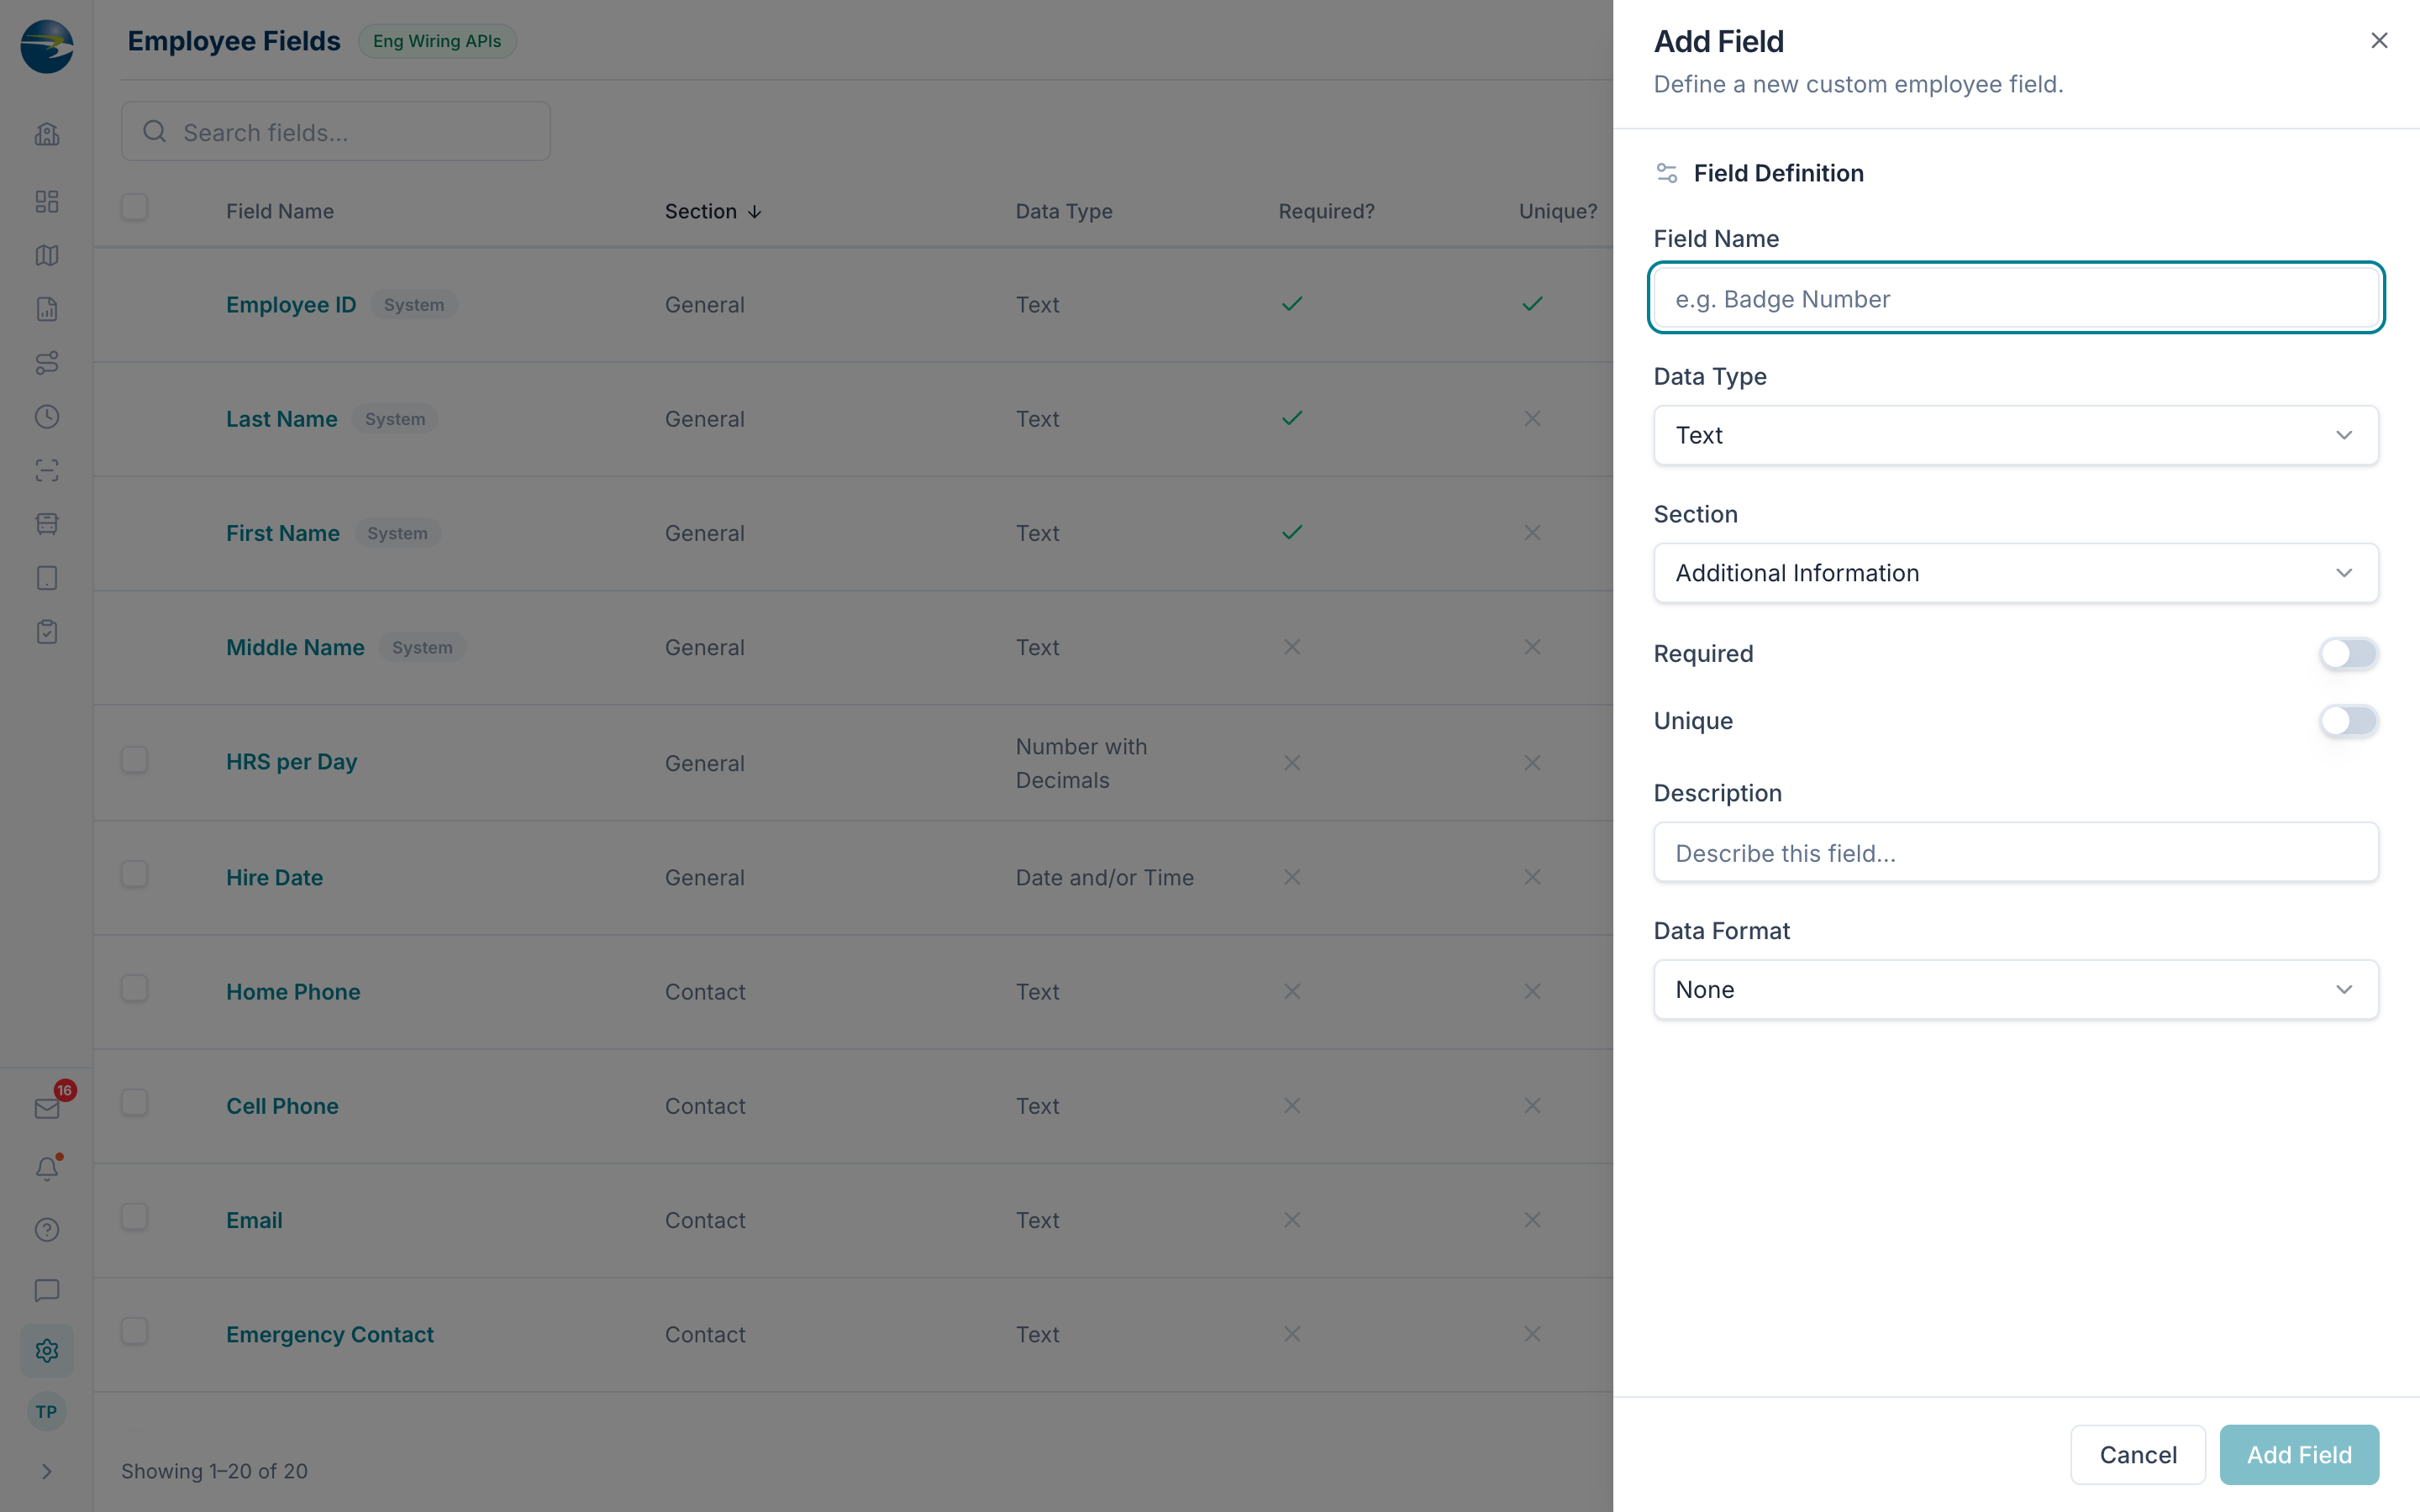 Adding an employee field.
Note
Data Format options depend on the data type. For example, Phone, Email, and Zip formats are only available on Text fields.
Edit a field
Click the field's name, or use the row's ⋯ → Edit. Make your changes and Save.
Note
A field's Data Type and Section are locked after it's created. You can still change the name, the required and unique settings, the data format, and the description.
Delete a field
Use the row's ⋯ → Delete, or select several with the checkboxes and delete them together.
Heads up
Custom fields can be deleted even if employees already have data in them, so double-check before removing one. System fields can't be deleted.
Organize fields into groups
Select Employee Field Groups in the header to open the groups dialog. Groups let you gather related fields together for reporting and to control which fields certain staff can see.
- The left panel lists your groups. All Fields is a built-in group that always contains every field and can't be changed or deleted.
- To add a group, use the input at the bottom of the list and press Enter.
- To rename a group, double-click its name.
- To delete a custom group, hover over it and select the delete icon. Removing a group doesn't affect the fields themselves.
- With a group selected, check the fields on the right that should belong to it. A field can belong to more than one group.
- Select Save Changes when you're done.
Good to know
- A name is required, and each field name must be different from your other fields.
- Department is reserved by the system and can't be used as a field name.
- Data type and section can't be changed once a field is created, so pick them carefully.
- Required fields must have a value on every employee record. Unique fields must have a different value for each employee.
- Deleting is safe: records are hidden, not permanently erased.
- If you don't have edit access, you'll see the list in view-only mode (no Add, Edit, or Delete). The Employee Field Groups button is still available.